|
Sparrow / NmG
Wiki |
Sparrow /
BatteriesSparrow >> Service >> Electrical >> Batteries IntroThe Sparrow was built to accommodate "Optima Yellow-Top" batteries. The battery boxes are close to the exact dimensions of those batteries and it's difficult to replace them with anything but these batteries. "Optima Blue-Top" batteries are the same thing with extra posts for attaching additional loads. Blue-Tops fit, though they make the installation of battery regulators more difficult, as the extra posts take up space that's useful in regulator placement. Optima batteries come in several sizes. The ones that fit are the "D34" model (Yellow-Top) or "D34M" model (Blue-Top). They're nominally 55Ah, though that's the twenty-hour rate, i.e. these batteries can put out 2.75A for 20 hours. We Sparrow owners are more interested in how much power these can put out in about a half hour. Typical Sparrow owners see about 20Ah of useful energy at this rate. See http://www.optimabatteries.com for more information. 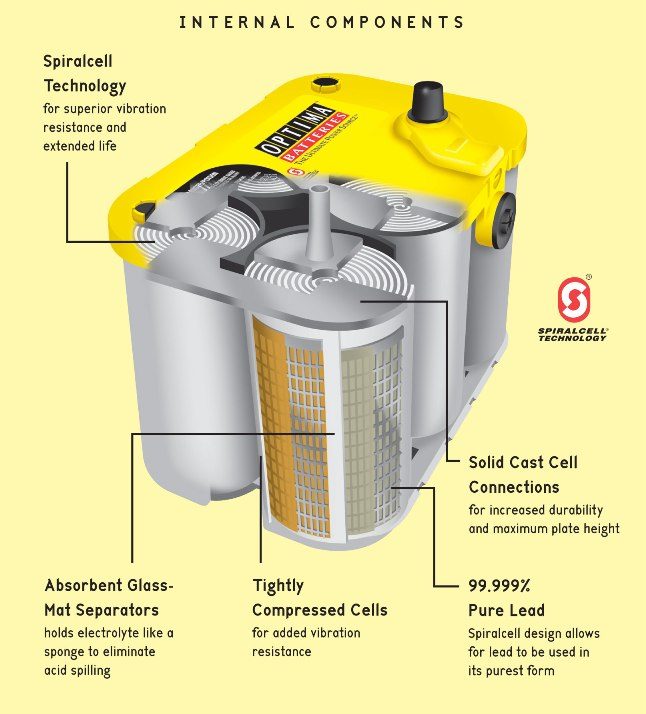 Charging with a 12 V charger
Replacing the Battery Pack"Disclaimer: Others will have better approaches than this one. Please revise, correct, or post alternate approaches here. Photos and procedures in this approach work with Sparrow #218; if your VIN number differs substantially, some of these photos and procedures will not match yours." Preparation: Park the Sparrow somewhere level, protected from moisture and theft. Take precautions against accidental electrocution or shorting:
Process:
|